Adding reflections to a scene with PIDI Planar Reflections 4.x is a very simple process that takes only a few minutes. To simplify the workflow of adding reflections in real-time and ensuring that they are as re-usable as possible within a level the process has been split into two main components, the Reflection Renderer which generates a reflection and its depth pass and a Reflection Caster which assigns it to a material and actually displays it in the scene.
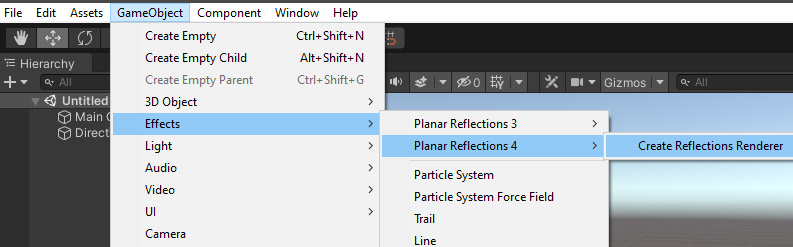
To add a Reflection Renderer to the scene go to the GameObject tab on the top of the Unity Editor, then to Effects, Planar Reflection 4, Create Reflections Renderer.
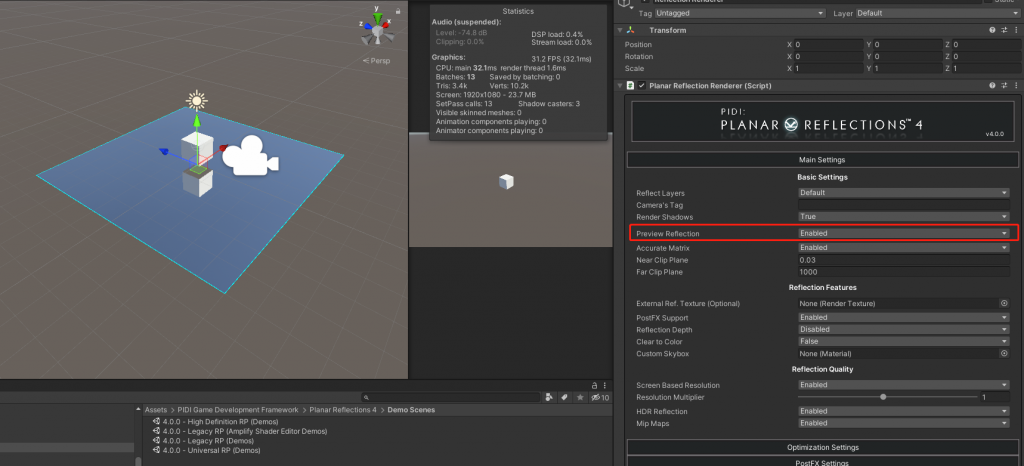
This will create an empty reflection renderer in the middle of the scene. By default, it will not display the preview reflection renderer but you can enable it easily on the Main Settings tab of the Reflection Renderer component.
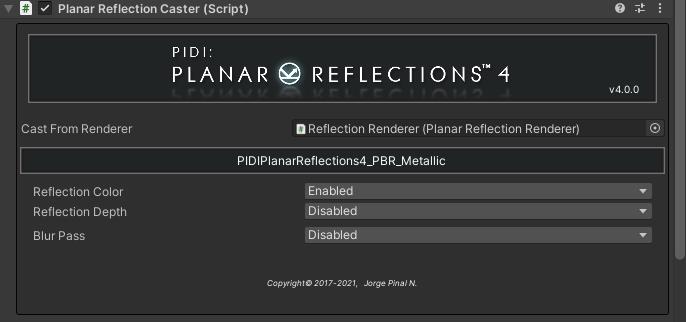
The reflection will not be visible at all on the Game View as it is not being displayed on any mesh at the moment. Let’s add a plane to the scene and use one of the demo materials included with the asset on it. In our case, the PIDIPlanarReflections4_PBR_Metallic material. We will also add a Planar Reflection Caster component to it.
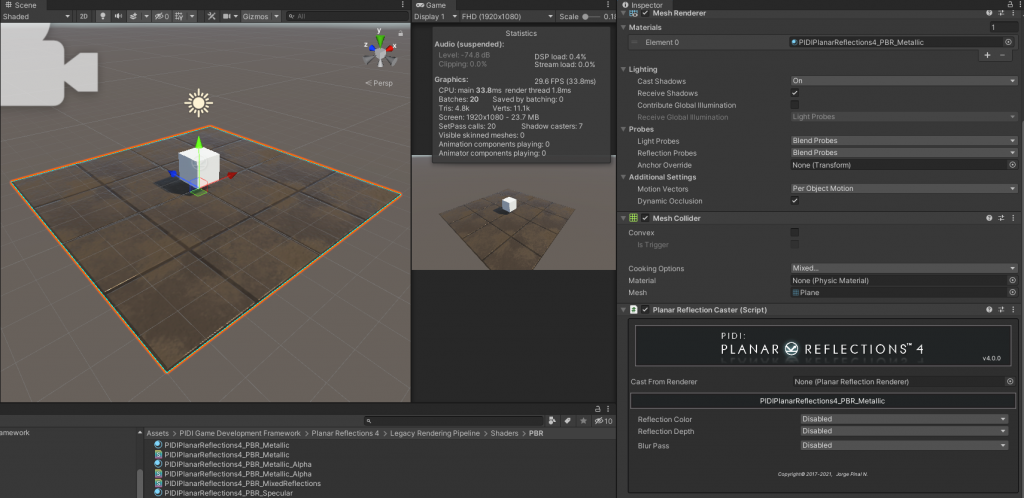
Then, as the last step, assign your Reflection Renderer to the Cast From Renderer slot and enable the Reflection Color feature in order to display the Reflection Color texture over the surface.
With this, the reflection is ready and will be displayed without issues in both the Game and Scene views. With Planar Reflections 4 you can also use our accurate roughness / smoothness based blur out of the box, integrated within the shader itself, without needing to enable the Blur Pass in the Reflection Caster component and with better performance.