
The Planar Reflection Renderer is the script responsible for rendering the real-time reflections and their corresponding depth pass.
General Settings
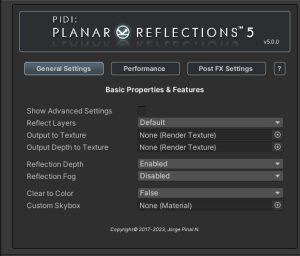
The General Settings tab contains the essential features and settings of a reflection renderer. The Reflect Layers drop out menu allows you to select which rendering layers will be rendered by the reflection. The optional Output to Texture and Output Depth to Texture slots allow you to specify custom RenderTextures to which the reflection and / or its depth will be rendered to. Here you can also specify whether the Depth and Fog pass of the reflection will be rendered as well as the way the background will be cleared, either to a custom color or to a Skybox.
If the Show Advanced Settings toggle is enabled, additional properties of the Reflection Renderer will become available.
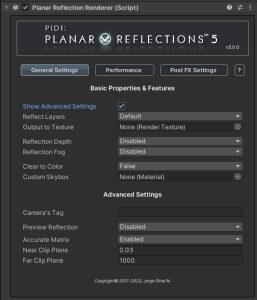
A Camera Tag can be specified in order to filter out which cameras request a reflection rendering pass. This can be useful to reduce overhead and limit the amount of processing that the Reflection Renderer does, allowing it to ignore unnecessary cameras.
The Preview Reflection setting enables or disables a preview mesh that will show, in the Scene View, the way the reflection is being rendered internally. This preview is not visible in-game.
By default, reflectors should use an Accurate Matrix, which ensures that the objects behind the reflective surface are not displayed as part of the reflection. This is achieved by modifying the near and far planes of the reflection camera internally, but this may cause conflicts with some screen space effects and other view dependent systems. To solve this, you may need to disable the Accurate Matrix, but in turn this will introduce other issues.
While the Near and Far clip planes of the reflective camera are heavily modified, you can still use these values to limit the range in which the reflections will draw objects, which may help to improve performance in scenes with huge scenes to reflect, such as a lake reflecting a landscape.
Performance Settings

Different settings to fine tune performance are available within the Performance tab. Here you can decide whether shadows should be reflected, adjust the LOD bias for the reflections (so that lower quality meshes are rendered in mirrors and other reflective surfaces) as well as a custom limit for the framerate. While reducing the framerate of the reflections may make them look choppy, this can be a very efficient way to reduce performance costs while remaining unnoticeable if balanced carefully against the game’s actual framerate.
The final resolution of the reflection can have a huge impact in performance, especially in scenes with complex shaders and visual effects. The resolution of the reflection can be set manually, or it can be based on the actual screen size the game is being rendered at, to ensure that the reflections keep a consistent quality at different screen resolutions.
Additionally, certain features applied to the output can help ensure a higher quality with a lower performance cost. Mip Maps paired with Anti-aliasing can allow for the reflections to be blurred with PBR enabled shaders as well as improve the look on lower resolution outputs, while HDR reflections will automatically be compatible with Bloom and other post process effects without the overhead of actually computing Post FX on the reflection itself.
Post FX Settings
Each Reflection Renderer component can set up support for Post Process FX with their unique volume layer masks. While most Post Process FX will work without issues with the Reflection Renderer (including ambient occlusion, color grading, bloom, depth of field etc.) some of them, especially those that depend on motion vectors or screen-based UVs (such as vignetting) may not work nor look correctly.
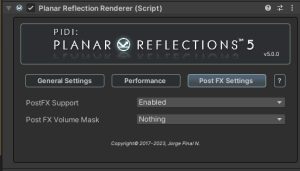
Once Post Process FX are enabled in the Planar Reflection Renderer you can set up with which layer is it going to interact. It is not recommended to use the same post processing volume for your main in-game camera and the reflections as this could cause some overlapping of effects, for example if you apply color grading to your scene you may end up applying color grading to the reflection and then a second pass of the same color grading through the main camera. This applies as well to Tonemapping effects, being useful in some cases to use a HDR enabled reflection instead and let the main camera’s tonemapping and bloom filters take care of the rest.
Help & Support 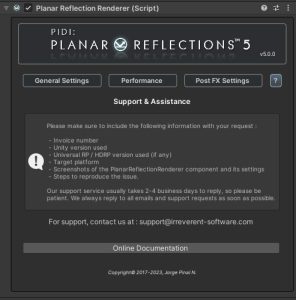
The last tab of the UI includes a small guide so that you can request support for our asset in a more efficient way, detailing steps to contact us and the information we require. It also contains a button that will take you to the latest version of this documentation file.