
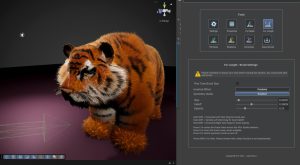
The next tool we will use is the Fur Length tool. This tool is an actual brush, and at this point we will learn how to style the fur in XFur Studio™ through the in-editor painting tools.
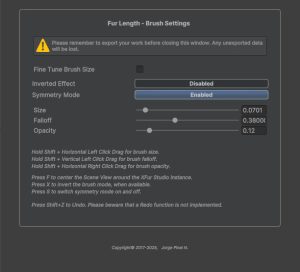
Each brush in XFur Studio™ Designer has several properties.
-
Fine Tune Brush Size: Allows you to control the minimum and maximum size that the brush can have.
-
Inverted Effect: Inverts the current brush. For masking, for example, it removes fur by default and adds it back when Inverted Effect is enabled. For fur length, it makes the fur shorter by default and grows it back to its default length when inverted.
-
Symmetry Mode: Mirrors the brush on the local X axis so that both sides of the model are painted at once.
-
Size, Falloff and Opacity: Control the size and strength of the effect applied through the brush.
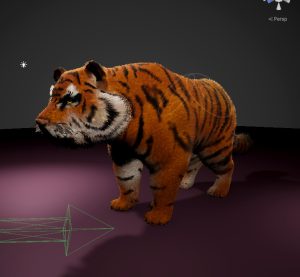
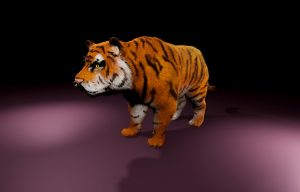
Using the brush for Fur Length with Symmetry Mode enabled and a very low opacity and falloff values, gently and slowly shorten the fur around the face of the tiger until its eyes and nose are fully visible.
Keep working your way around the tiger until its fur is very short, almost invisible around the paws, and overall short across the body. Remember that tigers have long fur around their cheeks, so leave it long around that area. For reference, check the picture below.
Using the Fur Mask tool in standard mode (not Inverted), remove the fur from the eyes and nose area, and try to remove it from the whiskers as well. If you struggle to select the whiskers, do not worry. We can clean the result by hand after we finish. If you remove fur from a wrong area by mistake, invert the brush and paint over it. This will make the fur grow back.
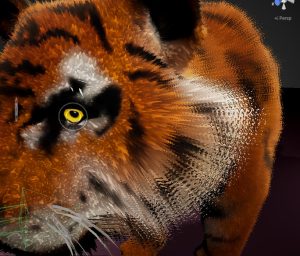
Next switch to the Shadows tool. Using it in Inverted mode, remove some of the shadowing from the face of the tiger. This will make the areas with short fur look better, as they will match the look of the mesh underneath more closely.

Finally let’s use the Grooming tool. The Grooming brush allows you to comb the fur of your model and set its direction by stroking it directly. Stroke the fur around the face of the tiger downwards, and the rest of its fur following the natural flow of the body of the animal. The fur on the legs, downwards. The fur on its back in a direction from its head towards its tail, etc.
Once you are done grooming the fur of the tiger, feel free to go back and do any further adjustments with the brushes or with the properties themselves. Play around with the different brushes and settings until you have something you are happy with.
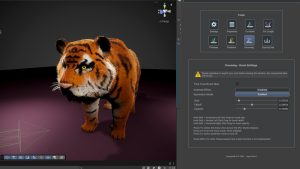
To finish this tutorial, let’s switch to the Export / Load tool and export our work.
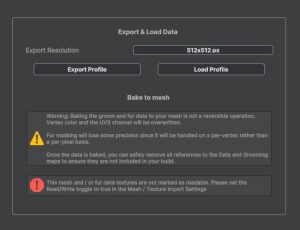
Here we have a few options. You can select the resolution of the exported maps, which is helpful when editing them in an external software. For now, let’s export the profile with the default resolution.
XFur Studio™ Designer will export three files, a Fur Data Map, a Fur Grooming Map and a Fur Profile Asset. Open the Fur Data Map on the image manipulation software of your choice, and it will look something like this:
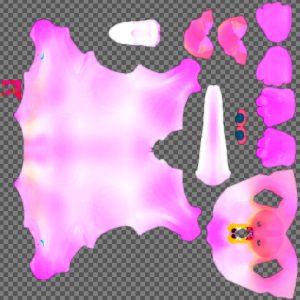
The small red squares on the left side are the whiskers. The white portion in the top center is the inside of the mouth. By painting them black, you will remove all fur from them.
In Fur Data Maps, red always controls the fur’s mask. Green, its thickness and blue its shadowing. They can be easily manipulated in external software.
Fur Grooming maps on the other hand represent directions specially encoded in tangent space. As such, they can only be authored with XFur Studio™ Designer.