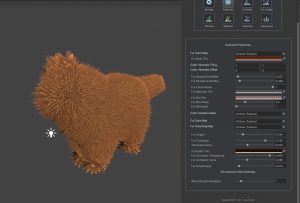
In the properties tab of the XFur Designer window you will find most of the configurable settings for the fur of your characters.

Fur Color Map is the texture map that contains all the color information for the fur. It is equivalent to the Albedo map in the Standard shader. The Fur Main Tint is the overall tint that will be applied to the fur covering the whole model.
The Color/Normals tiling and offset controls how the Fur Color map (and if available, the Normal map) should be tiled and offset at a UV level. The Fur Strands R & G Modifiers control the slight color variations between the R and G channels of the Fur Strands Assets. These values can be helpful to give a more natural color to the fur. The Fur Transmission value controls (in Universal RP and HDRP) how much light can go through the fur.
The Fur Specular Tint, Rim Tint, Power and Boost are self explanatory and control the appearance and intensity of the specularity and rim lighting applied to the fur.
The Color Variation Mask allows you to apply four different tints to the fur using this texture as a Splat Map, with each channel representing a different tint.
The Fur Data map controls which areas of the model are covered with fur (Red channel), its length (green channel), thickness (alpha channel) and shadowing (blue channel).
The Fur Grooming map controls the direction in which the fur grows, storing tangent-based vectors.
The next series of properties control the Fur’s Length, Thickness, a Thickness Curve going from root to tip, Occlusion and Occlusion Tint, as well as an Occlusion Curve. Finally there are two sliders to control the Smoothness of the fur and the intensity of the Wind applied through the XFur Studio Wind Zone object.
For the image above, we have reduced the thickness of the fur to produce thinner strands. We also modified the Occlusion to reduce its strength and give the character a fluffier appearance.
