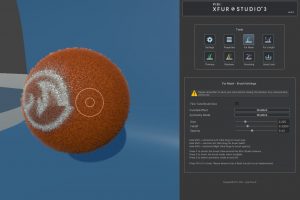
In XFur Studio™ 3 the UI for our fur instances has been completely redesigned in order to make working with them more efficient. The basic UI presents three different buttons or tabs, each one with its own set of options. These tabs are the Settings, Modules and Fur Designer tabs.
Please notice that the XFur Studio™ Instance component should always be attached to the root object of whichever model you are using. This ensures that LODs can be used properly, and that the component will be able to keep track of all resources without issues.

Settings
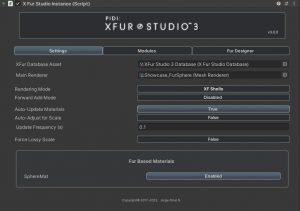
In the Settings tab you can assign the XFur Database that will be used for this instance, as well as the main Renderer that will display the fur (this can be either a Mesh Renderer or a Skinned Mesh Renderer). For models using LOD, you should always assign the highest quality LOD to this slot.
Depending on the rendering pipeline you will see different settings, such as the Rendering Mode for the Built-in pipeline, which allows you to select between XF Shells (which make use of GPU Instancing and can be very efficient to render) or Basic Shells, which may be more lightweight on older devices.
You can enable the Forward Add mode, which is useful when using full lights and shadows in Forward Rendering mode (for Built-in, Deferred is recommended). The Auto-Update materials allows you to make changes to the fur properties at runtime and have them show up immediately, without having to call for a manual update. The Auto-adjust for scale feature modifies some properties of the fur so that they remain consistent with models that are either bigger or smaller than the uniform scale (1,1,1). The Force Lossy Scale feature can be used to correct some issues present in models that, from the source, do not have an applied uniform scale.
Finally, a series of toggles are displayed in the Fur Based Materials box, one for each material in the renderer. These toggles allow you to enable or disable fur rendering from each one of the materials, giving you great control over the appearance of your model.
Modules
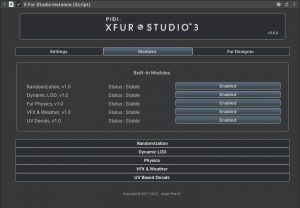
The modules tab allows you to enable or disable each one of the advanced XFur Studio™ modules, including the physics, LOD and VFX modules. Each module has its own set of options that will be displayed in this section as you enable them. We will cover in more detail what each module does and how to set them up, in their own sections of this documentation.
Fur Designer
In XFur Studio™ 2 all fur properties for each fur material were displayed as a series of drop down menus that linked together and made the UI difficult to navigate for some users. Further adjustments, such as grooming and the creation of Fur Data maps had to be done in a completely separated scene using an additional piece of in-editor painting software called XFur Designer. This workflow could easily turn cumbersome. To solve these issues, all fur editing is now done through the brand new XFur Studio Designer window, a completely in-Editor suite of tools and panels that can be opened from any XFur Studio Instance by just selecting the Fur Material you wish to edit and pressing “Enter Edit Mode”.
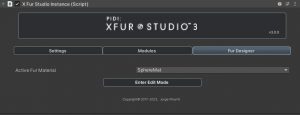
Once in Edit mode, the brand new XFur Studio Designer window will be displayed. There are several tools available in this window, including a Main Settings panel, a Properties panel and several different 3D painting brushes that will allow you to finely tune the appearance of the fur that covers your model by creating Fur Data Maps. All these settings can be exported to re-usable Fur Profile assets so that they can be applied to other models, by loading them through the same UI. XFur Studio Designer is a complex and fully featured set of tools, and as such it will be covered in detail in the next section of this documentation.
